Most businesses use Windows, which can make moving files from one platform to another annoying. There are many great things about Apple devices, though. Microsoft Excel has quickly become the standard spreadsheet programme for most businesses, schools, and even home computers because it works on both Windows and Mac. Thank goodness Apple has a built-in function that makes it easy to change a sheet from Apple Numbers to Excel if you’ve been using that app.
Here’s how to change Apple Numbers to Excel so that you can work together with team members who are using Windows software.
Convert Numbers to Excel on Mac
Outputting your Numbers worksheet to an Excel file is simple; all you have to do is export it.
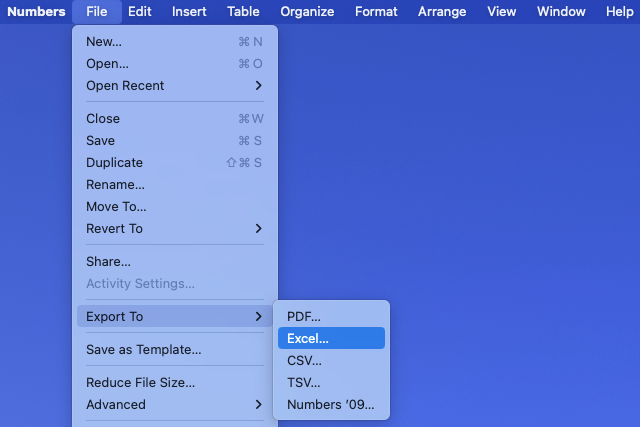
Step 1: Open your File in Numbers and go to the menu bar. Then, choose File.
Step 2: Click Export, and then pick Excel from the choice that comes up.
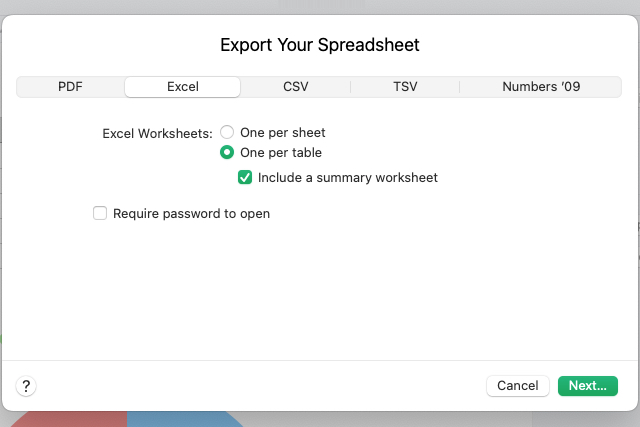
Step 3: Make sure you’re on the Excel tab when the Export Your Spreadsheet window pops up.
Step 4: Next to Excel worksheets, choose either “One per sheet” or “One per table.” This will depend on whether you want to make a worksheet for each notebook sheet or table.
You can choose to include a summary page if you tick the box next to One per table. There are quick links to all the tables on this page.
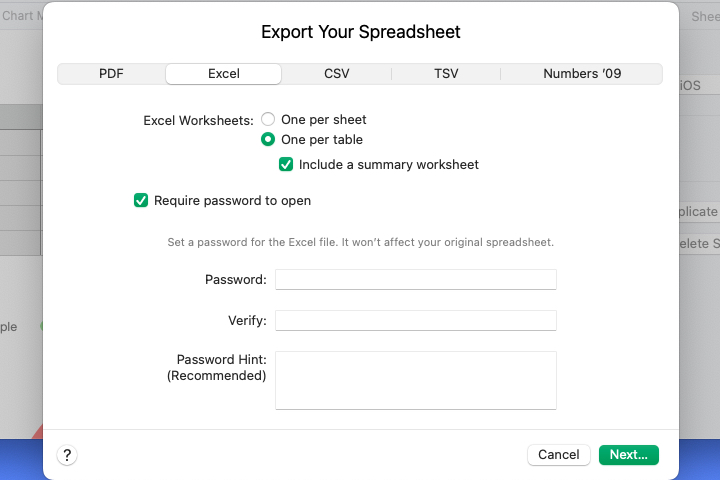
Step 5: You can check the box to make the exported worksheet need a password to open. If you pick this choice, you can enter the password, make sure it’s correct, and add a hint if you want to.
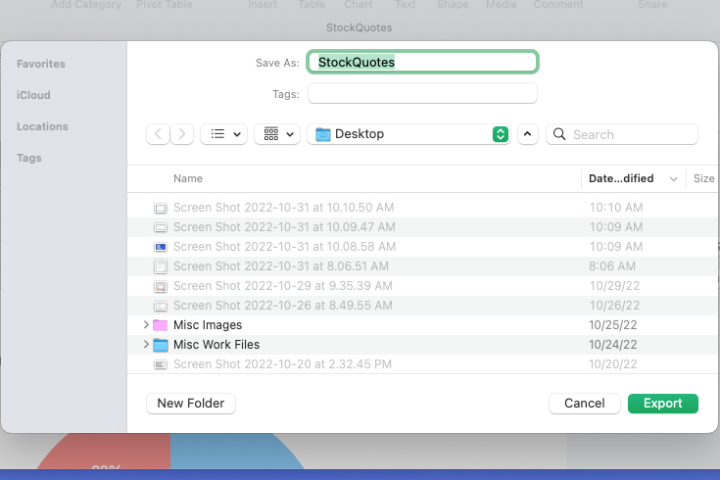
Step 6: Click Next, pick a place to save the File, and then click Export. You can change the name and add tags if you want to.
After that, go to where you saved the File to open it. After that, you can send or share the Excel file like any other Mac file.
Step 7: You can change these files at iCloud.com as well. To change a file to Excel, log in to your account, find the File, and click the “More” button. Next, you can pick which version you want to download the copy in (in this case, an Excel file).
Convert Numbers to Excel on iPhone and iPad.
You can send a workbook to Excel on your iPhone or iPad the same way you can on a Mac.
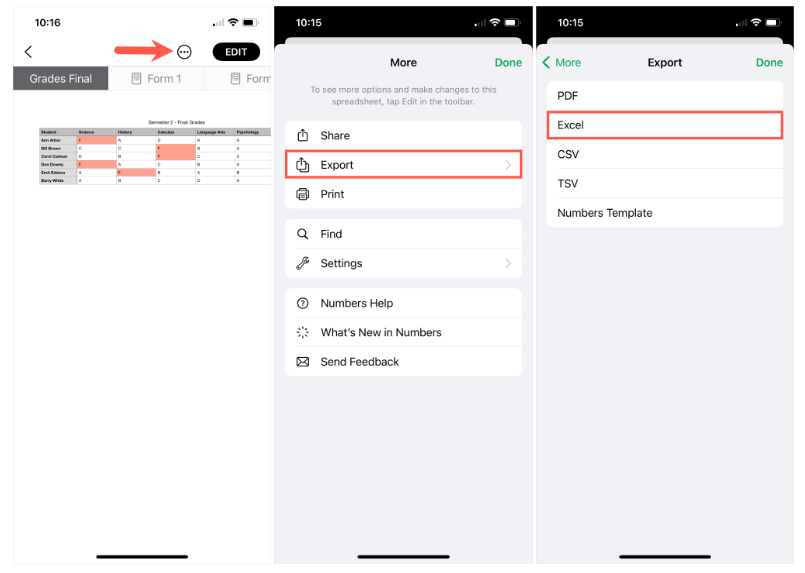
Step 1: To access your worksheet, open it in Numbers and go to the top right. Click on the three dots.
Step 2: Pick Excel from the list of export options. After that, click “Done.”
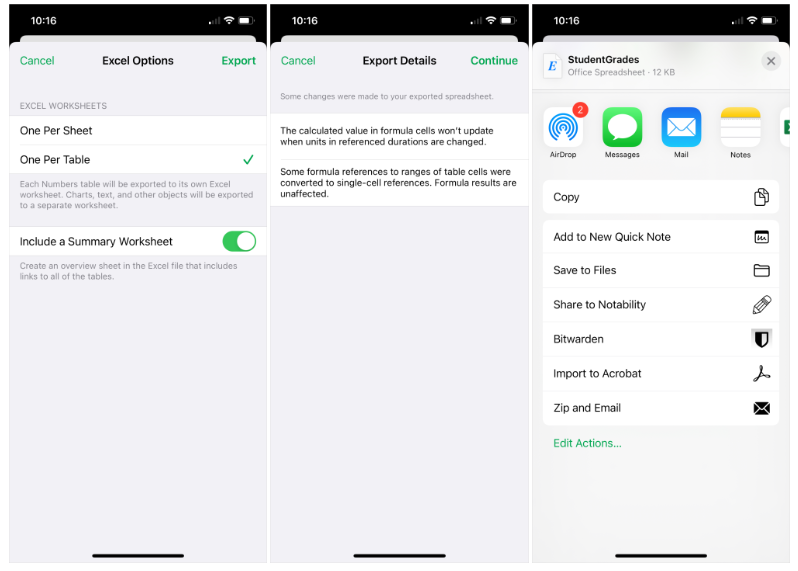
Step 3: Pick either “One per sheet” or “One per table.” For the second choice, you can turn on the toggle to include a summary worksheet if you want to.
Step 4: Click on Export.
You’ll see any changes that were made to your worksheet after the Export. Click on Continue.
Step 5: Pick a place to save, send, or share the saved File, and then do what it says to do next.
If you change an Apple Numbers workbook to an Excel file, it will be easy for everyone to open the File in Excel.

