
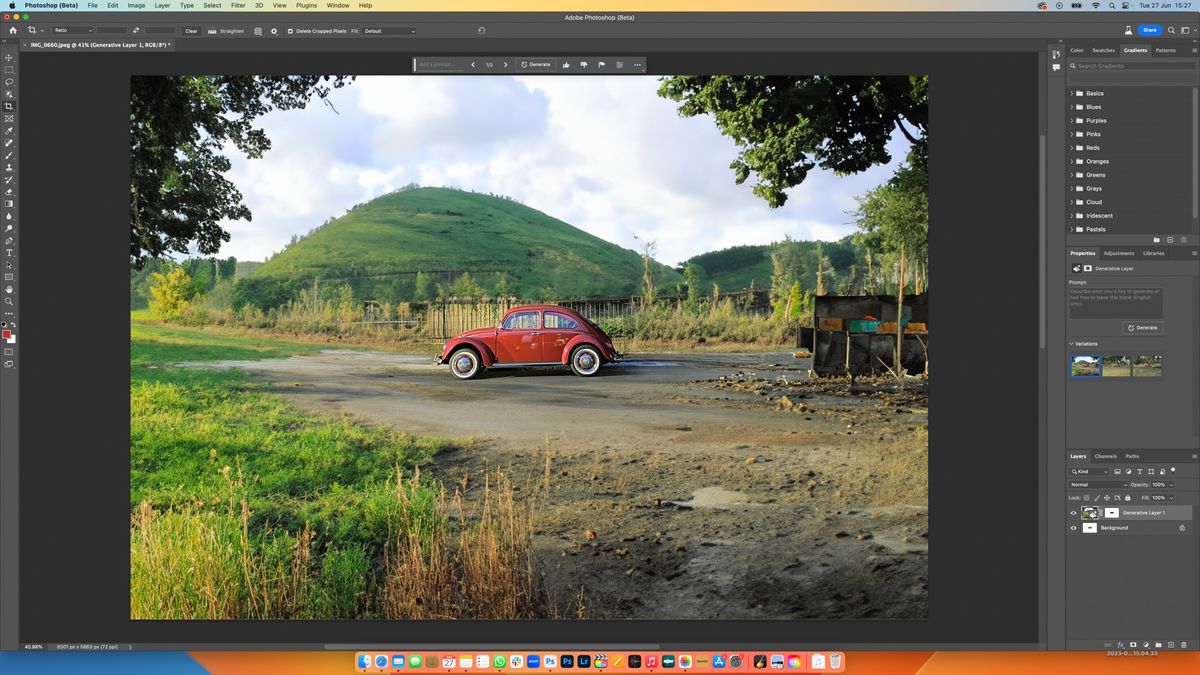
It’s Generative Fill that’s making the most noise out of all the new features Adobe Photoshop has added in the last few years. AI is used in one of Photoshop’s new features to make amazing effects, and this tool works almost like magic. It’s simple to make a picture more prominent and fill in parts that aren’t in the original data. You can also quickly get rid of things you don’t want, like distracting backgrounds or text that isn’t needed.
People who edit photos will love the Generative Fill tool, and the best part is that you don’t have to be an expert to use it. It actually lets regular people do editing work that used to be only possible for skilled professionals. Not everything can be done with this tool, but we’ll show you some great and useful ways to use it anyhow.
How to download PhotoShop Generative Fill
PhotoShop’s beta branch hides the Generative Fill tool and all of its functions, so you’ll need to get that before you can start.
- Step 1: You can use the free sample if you still need an Adobe account and a PhotoShop subscription.
Open the Creative Cloud app and choose Beta apps from the menu on the left if you already have an account.
- Step 2: Find “Photoshop (Beta)” and click on the Install button.
- Step 3: Set up, click “Open” to open the app.
- Step 4: When the beta begins, a notice on the new Generative Fill tool will appear in the form of a pop-up. You may obtain the Photoshop files you need to learn generated fill by clicking the “Try now” button.
To quickly learn what the new AI tool can do and how to use it, follow the steps shown on the screen. You can also read the sections below, which go over how to use it in more detailed situations.
In what ways does the dynamic fill toolbar help?
There are a lot of ways to improve or make your images bigger on the Photoshop generative fill menu. The following are some of the leading icons:
- Select a subject: AI is used to correctly figure out what the most essential part of the scene is, which is the “subject.” Then, it picks it out automatically, which lets you get rid of the background, make copies of your subject, or improve just that object.
- Remove background: This is a quick tool that Photoshop can use to get rid of an image’s background.
- Transform Image: This can flip your picture either left to right or left to right, based on how it was initially set up.
- Add an adjustment layer: Adding an adjustment layer allows you to alter the appearance of a picture. You might think of them as presets that have various filters applied to them.
- Taskbar appearance: It lets you change how the generative fill menu looks on the taskbar.
- Properties panel: This lets you choose whether to show or hide the Image’s properties panel and any of its creative layers.
These buttons can do a lot on their own, and you should try them out to see what applications you can find. But you can also use creative fill in more specific ways, which often work even better.
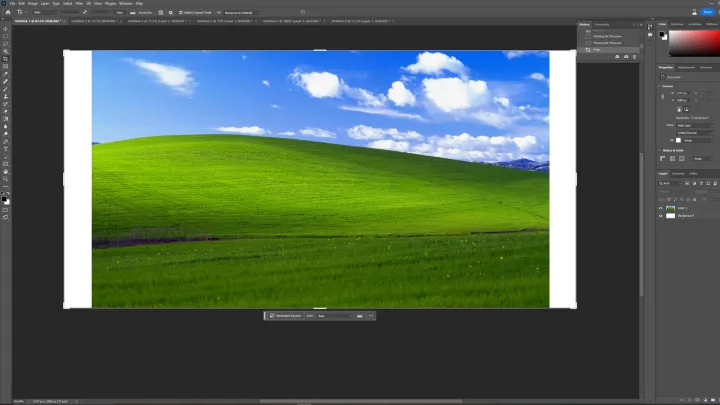
Use AI to make your pictures bigger.
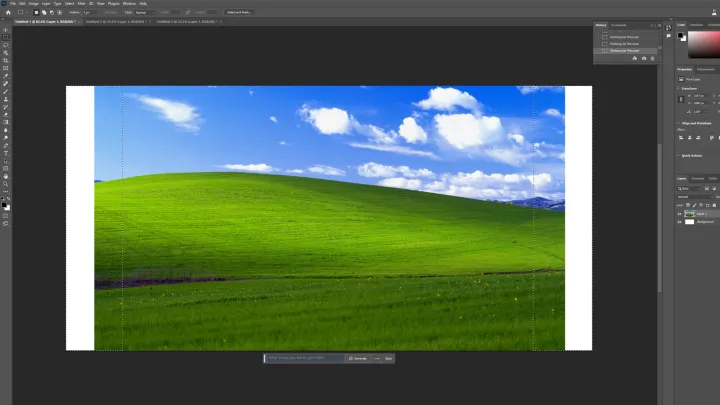
If you want your picture to be bigger, have a broader or taller aspect ratio, or have more in it, the generative fill order is excellent. You only need to choose a picture, tell the tool where to make new content, and press the button. You can even tell it what you want to see through writing.
- Step 1: Launch the image editor and choose the one you wish to highlight. Then, to make the image bigger, you can use the crop tool or go to Image> Canvas size. Be sure to leave the background black or white to hide the additional room.

- Step 2: In the toolbar, second from the top, find the selection tool. Use it to pick the black areas you want to fill and any other areas you want Photoshop to take samples from to make the new content.
- Step 3: Select Generative fill.
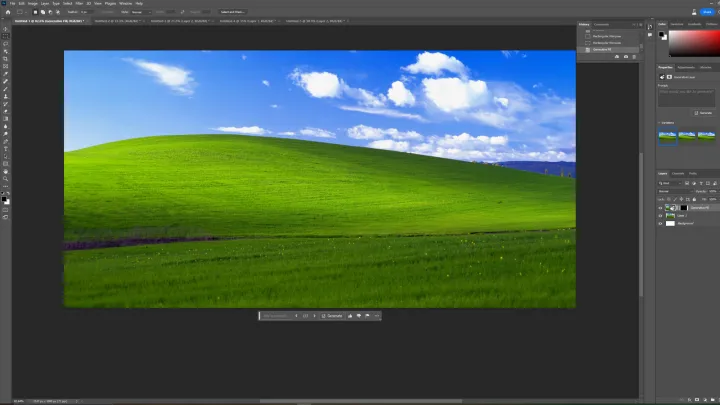
- Step 4: Type something into the text box if you don’t want more of the same. If you do, leave it blank and click the Generate button.
- Step 5: After the process is done, you should have a picture that is much bigger but still looks a lot like the original.
Add new objects to a scene.
It can be challenging to know how to Photoshop people or things into scenes and get the lighting, reflections, colour tone, and sizes just right. This is usually a job best left to professionals. But no longer. Using generative fill, you can easily add various effects to an image using only a few keystrokes and mouse clicks.
- Step 1: Pick out a part of the picture where you want to add new things.
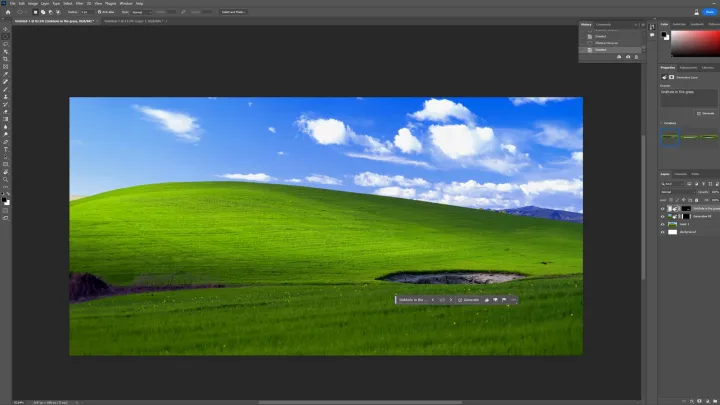
- Step 2: Choose “Generative fill,” and then type whatever you want to show up in the box. We’re still using the same Windows XP background, but we want to add a sinkhole to the hills, so I typed “Sinkhole in the grass.”
- Step 3: Next, press the left and right arrows next to “1/3” to try out one of the three forms of your prompt that generative fill made. This will help you choose the best one.
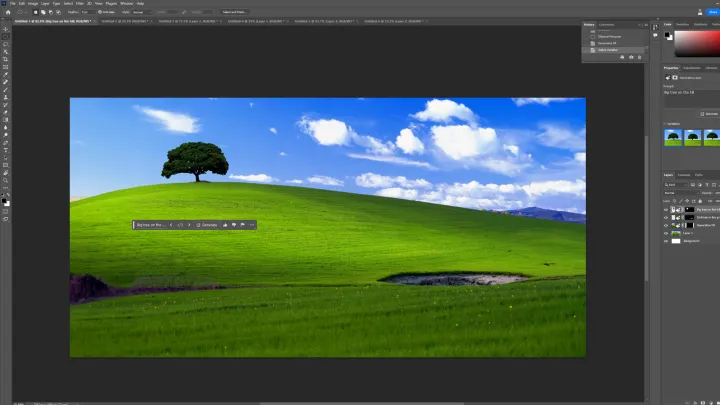
- Step 4: Let’s add something else just for fun. A simple “Big tree on the hill.”
- Step 5: It could be better, but it looks good. You should change your text question a few times before you get the fills to look the way you want them to.
Remove elements quickly and easily.
Would you instead get rid of something that’s making the scene hard to watch? That can also be done with generated fill.
Step 1: Open the picture from which you want to remove something, and use your chosen selection tool to make a rough outline of the thing you want to remove. After that, choose Generative to fill and then Generate. This tells Photoshop to remove the current background and add a new one that fits the pixels around it. It will put something else there if you add it to the text window before you hit Generate.
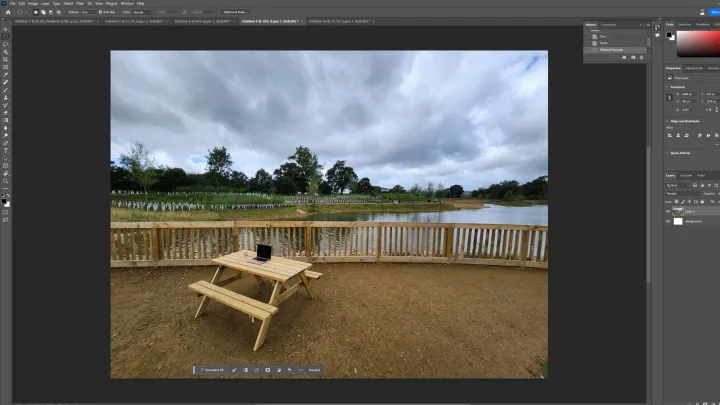
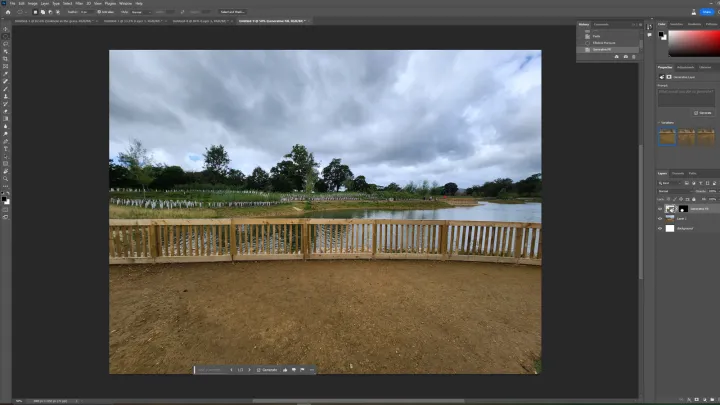
Step 2: After that, your item should be taken out of the picture. Yes, it can do hard things too. In this picture, the bench has been taken away, but the ground and the slatted fence have been left alone, even though they have a slightly off appearance. The lighting reflection in the water beyond is different, but at first look, it would be hard to tell that this picture wasn’t Photoshopped.
Which Photoshop version has generative fill?
The generated fill feature is only available in Adobe Photoshop 25 and later versions. You can find out what version of Photoshop you are using by going to the menu bar, clicking Help, and then clicking System Info. This will show you details about your programme, such as the version of Photoshop you are using.
If you have the right tools, you could use this one for anything. Try different things and see what you can make. Do you want to see what else AI can do now? Talk to ChatGPT. You’ll be shocked at how true it is.


