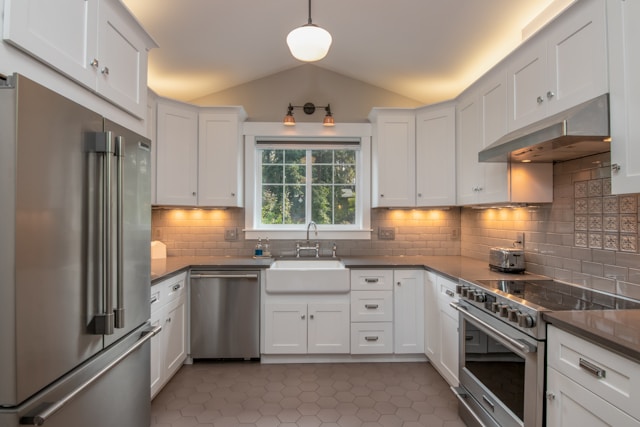
Under-cabinet lighting is an excellent way to enhance the functionality and aesthetics of your kitchen. It not only improves visibility for cooking but also adds a modern touch to your space. Whether you prefer LED strip lights or puck lights, the right under-cabinet lighting installation can elevate your kitchen’s ambiance. In this guide, we’ll walk you through the step-by-step process of installing under-cabinet lighting to achieve a sleek and professional look.
Benefits of Under-Cabinet Lighting
Before diving into the installation process, let’s explore why installing under-cabinet lighting is a great home improvement project:
- Enhanced Visibility – Under-cabinet lighting illuminates countertops, making meal prep and cooking easier.
- Stylish Ambiance – Soft lighting under cabinets adds depth and sophistication to kitchen decor.
- Energy Efficiency – LED under-cabinet lights consume less electricity than traditional bulbs, helping reduce energy costs.
- Increased Home Value – A well-lit kitchen is a desirable feature for potential buyers, making it a worthwhile upgrade.
Choosing the Right Type of Under-Cabinet Lighting
There are several types of under-cabinet lighting to choose from, each offering unique benefits.
- LED Strip Lights – Easy to install and energy-efficient, LED strip lights provide continuous illumination. They are ideal for modern kitchens and come with dimmable options.
- Puck Lights – These small, round lights offer concentrated brightness, making them perfect for task lighting.
- Hardwired vs. Plug-in Options – Hardwired lights connect directly to your home’s electrical system, offering a seamless look, while plug-in lights are more DIY-friendly and easy to install.
Tools and Materials Needed
Before starting your under-cabinet lighting installation, gather the following tools and materials:
- Measuring tape
- Screwdriver or drill
- Wire connectors
- Adhesive or mounting brackets
- Power source (electrical outlet or direct wiring kit)
- Under-cabinet light fixtures of your choice
Step-by-Step Installation Guide
Step 1: Measure and Plan the Layout
Start by measuring the length of your cabinets to determine how many lights you need. Mark the positions where you’ll install the fixtures to ensure even lighting.
Step 2: Choose a Power Source
Decide whether you will use a plug-in adapter or hardwire the lights. Plug-in lights are easier for DIY projects, while hardwired lights require electrical connections.
Step 3: Install the Mounting Hardware
If you’re using LED strip lights, peel off the adhesive backing and attach them under the cabinets. For puck lights, screw the mounting brackets into place. Ensure the lights are secure and evenly spaced.
Step 4: Connect the Wiring
For plug-in lights, simply plug the power adapter into an outlet. If you’re hardwiring the lights, turn off the circuit breaker, connect the wires using wire connectors, and secure the connections.
Step 5: Test and Adjust
Turn the power back on and test the lighting. Adjust the positioning if needed to ensure an even distribution of light.
Tips for a Professional Finish
- Hide wires – Use cable clips or wire channels to conceal wiring for a clean look.
- Use a dimmer switch – Installing a dimmer switch allows you to adjust brightness for different lighting needs.
- Choose the right color temperature – Warm white lights create a cozy ambiance, while cool white is ideal for task lighting.
Common Mistakes to Avoid
- Skipping measurements – Inaccurate measurements can lead to uneven lighting. Always double-check before installation.
- Ignoring ventilation – Some light fixtures generate heat, so ensure proper ventilation to prevent overheating.
- Selecting the wrong light color – Choosing lights that are too warm or too cool can affect the overall look of your kitchen.
Conclusion
Installing under-cabinet lighting is a simple yet effective way to enhance your kitchen’s functionality and style. Whether you opt for LED under-cabinet lights or puck lights, following these steps will help you achieve a professional and polished finish. With the right lighting, your kitchen will look more inviting and modern.


