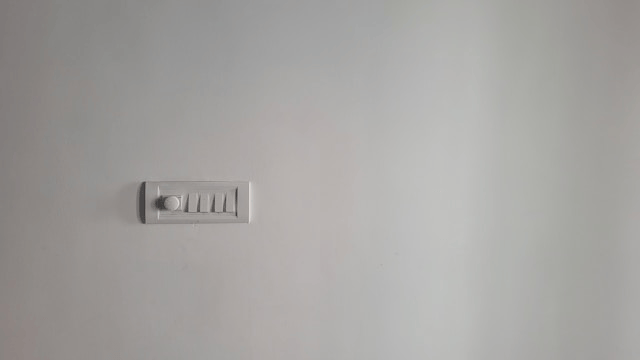
Installing a dimmer switch is a simple yet impactful upgrade that enhances your home’s ambiance and energy efficiency. Whether you’re looking to create a cozy mood in your living room, add flexibility to your kitchen lighting, or simply save on your electricity bill, dimmer switches are a smart, affordable solution.
This guide will walk you through how to install a dimmer switch safely and correctly, covering everything from the types of dimmers available to troubleshooting common issues. Whether you’re an experienced DIYer or just getting started with electrical home improvement projects, this tutorial will help you get the job done with confidence.
Why Install a Dimmer Switch?
Before jumping into the installation, let’s talk about why dimmers are worth the effort.
Benefits of Dimmer Switches:
-
Adjustable lighting: Set the perfect brightness for reading, relaxing, or entertaining.
-
Energy efficiency: Lower light levels use less electricity.
-
Extended bulb life: Dimming lights reduces stress on bulbs, especially LEDs.
-
Stylish control: Modern dimmers come in sleek designs, enhancing your home’s look.
-
Smart options: Many dimmers now support remote control and scheduling via smartphone apps.
Replacing a light switch with a dimmer can be a small change with big visual and functional payoff.
Types of Dimmer Switches
Not all dimmers are created equal. Choosing the right one is essential for performance and safety.
Common Types:
-
Rotary dimmers: Twist knob to adjust brightness classic and simple.
-
Slide dimmers: Slider for brightness, sometimes with an on/off toggle.
-
Touch dimmers: Capacitive touch panels for modern, seamless control.
-
Smart dimmers: Wi-Fi or Bluetooth-enabled for remote control and automation.
Bulb Compatibility:
-
LED-compatible dimmer switch: Essential for flicker-free performance with energy-efficient bulbs.
-
CFL-compatible dimmer: Only use dimmers rated for CFLs to avoid damage.
-
Incandescent and halogen dimmers: Older styles work well with traditional bulbs but may not suit LEDs.
Circuit Types:
-
Single-pole dimmer: Controls one light from one location (most common).
-
Three-way dimmer: Controls one light from two or more locations (e.g., top and bottom of stairs).
Always check the packaging to ensure compatibility with your wiring and light fixtures.
Tools and Materials Needed
Before starting your DIY dimmer switch installation, gather these tools and materials:
-
Flathead and Phillips screwdrivers
-
Voltage tester or multimeter
-
Wire strippers
-
Needle-nose pliers
-
Electrical tape
-
Dimmer switch (correct type for your setup)
-
Wire connectors (usually included with the dimmer)
Optional but helpful:
-
Flashlight or headlamp
-
Labeling tape (for marking wires)
Safety First: Turn Off the Power
Electricity is not something to mess with casually. Follow these precautions before touching any wires:
-
Turn off power at the breaker box
Locate the circuit breaker controlling the light switch and flip it to OFF. -
Test the circuit
Use a voltage tester on the existing switch terminals to confirm the power is off. -
Wear protective gear
Gloves and eye protection can help guard against accidents or exposed metal parts.
If you’re unsure about anything, it’s always safer to consult a licensed electrician.
How to Install a Dimmer Switch:
Ready to get started? Here’s how to install a dimmer switch to replace a standard toggle switch.
Step 1: Remove the Existing Switch
-
Unscrew the switch plate and gently pull out the existing switch.
-
Use the voltage tester again to double-check there’s no live current.
-
Take note of how the wires are connected (take a photo if needed).
Step 2: Identify the Wires
Typical wire setup includes:
-
Line (hot): Brings power from the panel
-
Load: Sends power to the light fixture
-
Ground: Usually green or bare copper
-
Neutral (optional): Required for some smart dimmers
Step 3: Disconnect the Old Switch
-
Loosen the wire screws or remove wire nuts.
-
Carefully separate the wires for safety.
Step 4: Connect the Dimmer Switch
-
Match wires according to the dimmer instructions:
-
Line to line, load to load, ground to ground
-
Use wire nuts and wrap connections with electrical tape
-
-
If it’s a three-way switch, follow the specific diagram for matching traveler wires.
Step 5: Mount and Secure
-
Gently push wires back into the box.
-
Secure the dimmer switch with mounting screws.
-
Attach the new wall plate.
Step 6: Restore Power and Test
-
Flip the breaker back on.
-
Test the dimmer by adjusting brightness levels.
-
If lights flicker or don’t respond, turn the power off and check connections again.
Troubleshooting Common Issues
Sometimes things don’t go perfectly the first time. Here are a few problems you might run into:
Flickering Lights
-
Likely caused by incompatible bulbs. Use dimmable LEDs with an LED-compatible dimmer.
Buzzing or Humming
-
Common with older dimmers or when used with certain LED bulbs. Try upgrading to a newer model.
Switch Not Working
-
Double-check wiring connections. Ensure wires are firmly attached and correctly matched.
Smart Dimmer Setup Issues
-
Refer to the manufacturer’s app and follow pairing instructions carefully.
-
Ensure your home Wi-Fi is working properly.
If you’re ever in doubt, stop and call a professional for help.
Smart Dimmer Installation (Optional Upgrade)
If you’re diving into the world of smart homes, installing a smart dimmer switch can add extra functionality. These devices allow you to:
-
Control lights remotely via an app
-
Create lighting schedules
-
Integrate with smart home platforms like Alexa, Google Assistant, or Apple HomeKit
-
Monitor energy usage
Installation is similar to a standard dimmer, but most require a neutral wire. Be sure to check your switch box before purchasing.
Conclusion
Learning how to install a dimmer switch is a manageable project for most DIYers and one that brings instant gratification. From saving energy to creating the perfect lighting mood, the advantages go far beyond aesthetics.


