We all love making memories, and a quick picture of a beautiful scene, a party in full swing, or a particularly delicious meal is a great way to keep those memories alive. The Apple iPhone can now add a location to your photos, so it can put them all in a book with a location theme or show you all the photos you’ve taken in a particular place. It’s a cute little feature that makes the Photos app more unique.
But privacy is also essential. You might be okay with your Location being shown in photos, but you might not want everyone to see it when you share your snaps. That’s why we made this guide: so you can know how to remove location information from photos before you post them on social media. There are also steps you can follow to stop your iPhone from taking your location data at all if you don’t want it to.
How to find photos with location data
There is some information about your Location that you need to know about before you can delete it. The Apple Photos app has a spot that makes all of these stand out, making it easy to find.
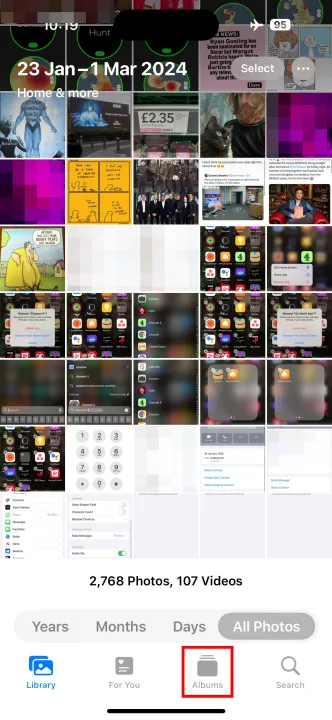
- Step 1: Open your Photos app.
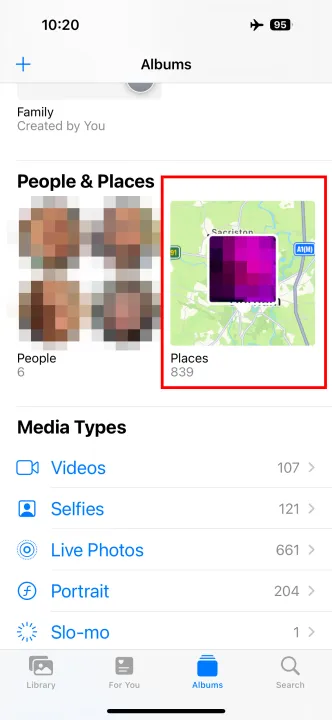
- Step 2: Click on the Albums tab.
- Step 3: Find the Places record by scrolling down.
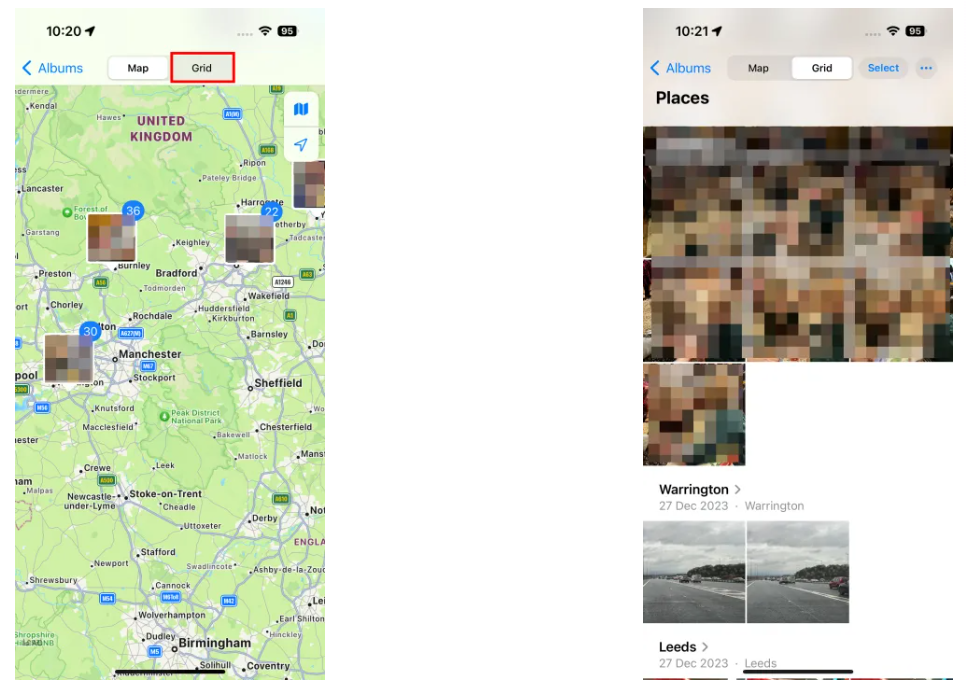
- Step 4: It will show you a picture of all the places you’ve been. To see a grid instead, go to the top of the screen and choose Grid.
How to remove location data from photos
You need to know how to get rid of that place from the picture now that you know where to find it. How to do it.
Please keep in mind that this process only partially removes the place from the picture. It’s taken out of the working copy of the picture, just like any other edit, but it stays in the original EXIF data. This means you won’t be able to see it in the Photos app or any other app you use to open or share it. However, you can still see it if you use the Mac Photos app to export the “Unmodified original” from the iCloud Picture Library or connect the original picture to a computer via USB.
You can avoid inadvertently sharing images that reveal your location by removing it in this way. When you select photos from your library to share or publish on social media, only the version of the photo without the location will be utilized.
- Step 1: Locate the image whose background you wish to remove in the Photos app.
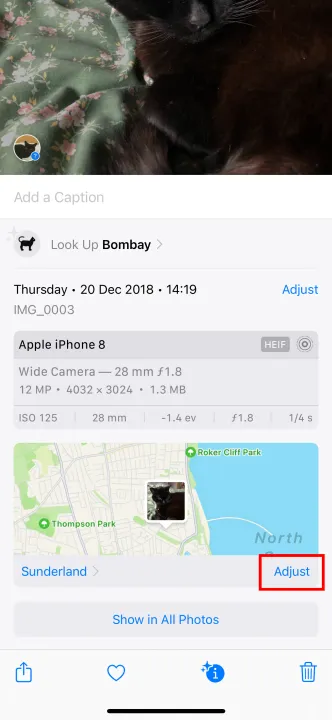
- Step 2: Swipe up to see the screen with more information. Along with information like aperture, f-stop, quality, and size, this will tell you when the picture was taken and what kind of camera was used. Below, there should be a map of the area where the picture was taken.
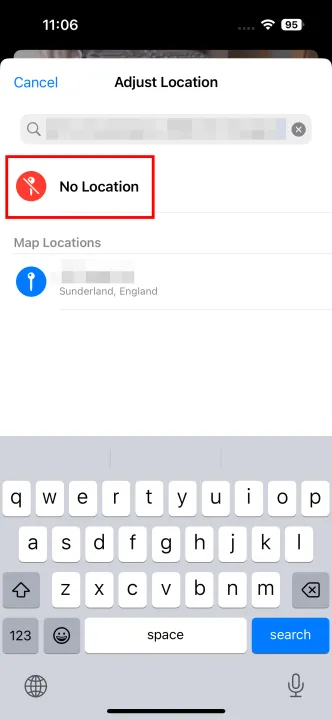
- Step 3: Use the button in the bottom right area of the map to make changes. A screen called “Adjust location” will show up.
- Step 4: Tap not found. When you get back to the information screen, the map should be gone, and a button to “Add a location” should be there instead.
Removing the Location from a photo.
You can also get rid of the location information from multiple pictures in your library at once. However, the process is a little different because you can only see the complete information for one photo at a time. This is how you do it.
- Step 1: Launch the Photos app and locate the album containing the images whose geotags you wish to delete.
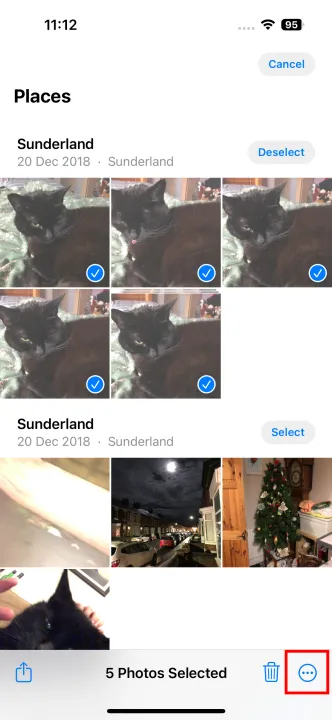
- Step 2: Click the “Select” button in the upper right area and pick out each picture.
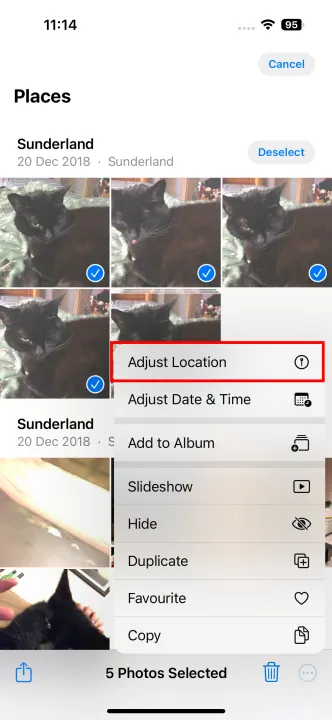
- Step 3: Go to the bottom right of the screen and click on “Menu.” Next, click on “Adjust location.”
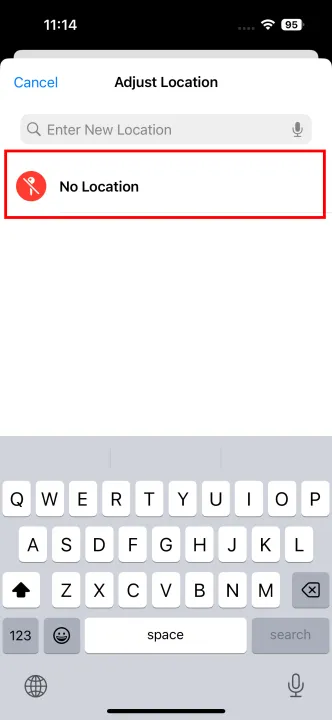
- Step 4: Pick “No location” to remove the pictures’ location information.
Stopping the automatic addition of location data to your images
Are you sick of your camera tracking your Location every time you take a picture? Well, there is one way to turn it off. Do these things.
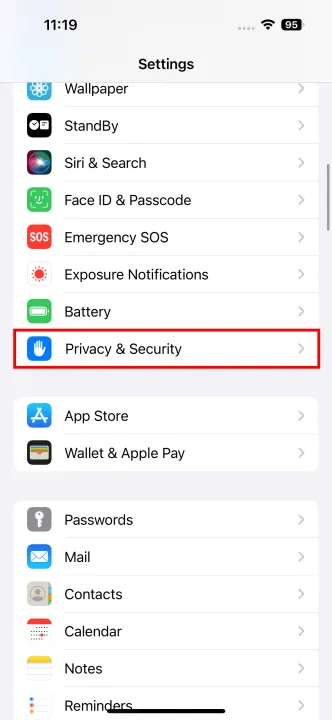
- Step 1: Open the app that has settings.
- Step 2: Find Privacy & Security and click on it.
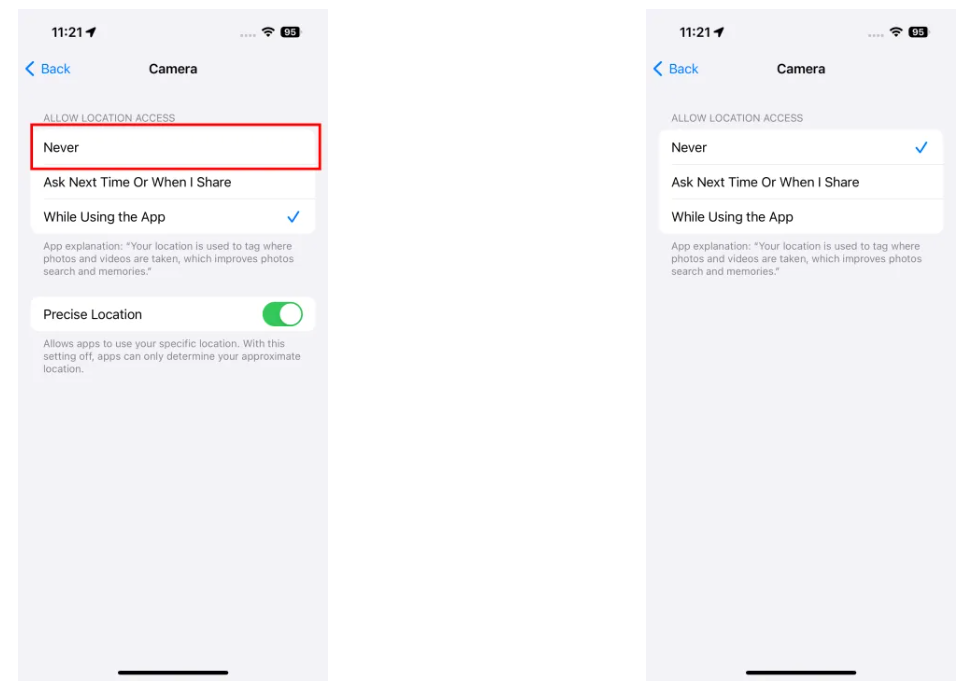
- Step 3: Click on Camera > Location services.
- Step 4: To stop the Camera app from getting your Location, go to Allow location access and choose Never.
Steps to take before sharing images to hide their location
Want your pictures to show where they were taken but want to keep that information private from social media? Since you have to do this every time you share a picture, Apple has made it very easy to remove the information before you send it. However, you will need to be careful. This is how you do it.
Keep in mind that you can only get rid of location data when you share directly from the Photos app. If you want to be sure that your location data is gone correctly, you must start there. Even in Apple’s own Messages app, this won’t work if you attach a photo to a post on third-party apps like Twitter or Facebook.
- Step 1: Find a picture you want to share in the Photos app and tap it to open it.
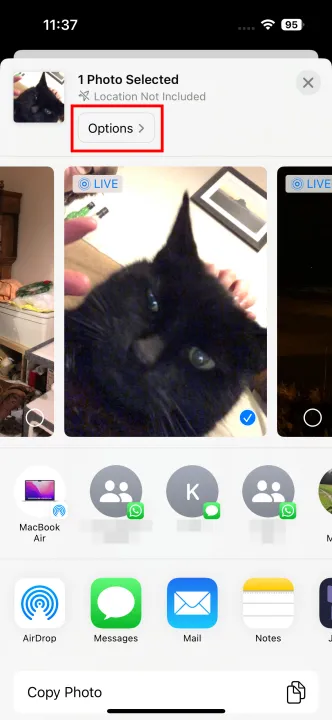
- Step 2: In the bottom left area, tap the Share button. The usual sharing choices should show up.
- Step 3: At the top, below the selected photo, you should see the position stored in the photo. There is also a tiny button that says “Options.” Click the button that says Options.
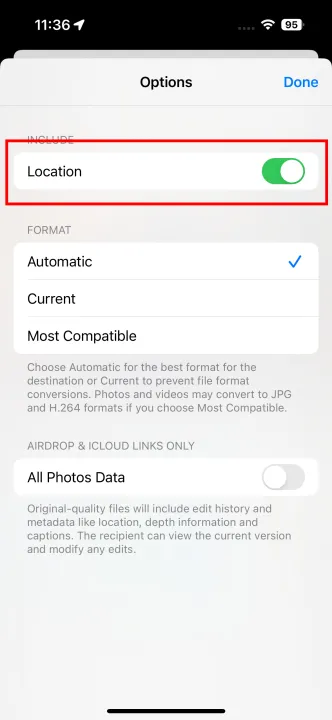
- Step 4: To turn Location off, tap the switch next to it.
- Step 5: Click “Done.” You will be taken back to the screen for sharing, where “No location” should now be at the top.
- Step 6: Share the picture like you normally would. Before you share, all location information will be removed. This way, neither the people you’re sharing with nor the message or social media apps you’re using will be able to tell where the picture was taken.


