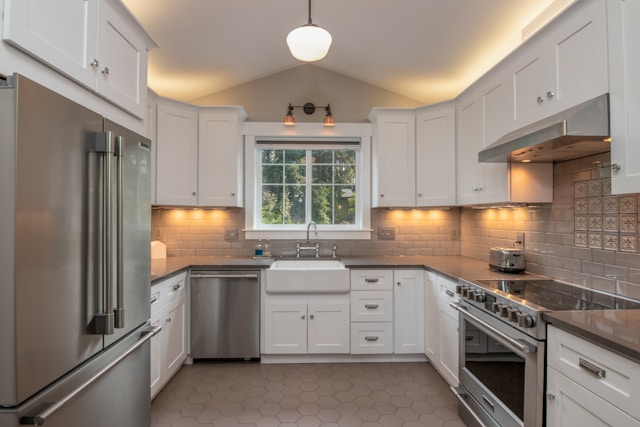
Giving your kitchen a fresh new look doesn’t have to break the bank. One of the most affordable ways to upgrade your space is by painting kitchen cabinets. With the right technique, tools, and patience, you can achieve a professional-looking finish that makes your kitchen feel brand new. In this step-by-step guide, we’ll walk you through how to paint kitchen cabinets like a pro, ensuring a smooth and durable finish.
Why Paint Kitchen Cabinets?
Kitchen remodeling projects can be costly, but painting cabinets is a budget-friendly alternative to replacing them. A fresh coat of paint can transform outdated or worn-out cabinets, brightening up your space without the high cost of new cabinetry. Additionally, choosing the right color can make a small kitchen feel larger or create a stylish, modern aesthetic.
Materials and Tools Needed
Before you start, gather the necessary tools and materials to ensure a seamless painting process:
Paint Types:
- Latex Paint: Water-based and easy to clean, dries quickly, and has low VOCs.
- Oil-Based Paint: More durable but takes longer to dry and has stronger fumes.
- Chalk Paint: Popular for a vintage or matte look, requires sealing with wax or polyurethane.
Essential Tools & Supplies:
- Sandpaper (120- and 220-grit)
- Tack cloth or microfiber cloth
- Degreaser or TSP cleaner
- Painter’s tape
- Screwdriver (for removing cabinet hardware)
- High-quality paintbrushes
- Foam rollers for a smooth finish
- Paint sprayer (optional for even application)
- Primer (stain-blocking or adhesion primer recommended)
- Polyurethane sealer (for extra durability)
Step 1: Remove Cabinet Doors and Hardware
Start by taking off all cabinet doors, drawers, and hardware (handles, knobs, hinges). Use a screwdriver to remove them carefully, and label each door and drawer to make reinstallation easier. Place all screws and hardware in a bag to avoid losing them.
Step 2: Clean and Degrease
Kitchen cabinets accumulate grease and grime over time, which can affect paint adhesion. Use a degreaser or TSP cleaner to thoroughly clean all cabinet surfaces. Let them dry completely before moving to the next step.
Step 3: Sanding for a Smooth Finish
Lightly sand all surfaces with 120-grit sandpaper to remove the glossy finish and help the primer adhere better. After sanding, wipe down all surfaces with a tack cloth or microfiber cloth to remove dust. If your cabinets have deep scratches or dents, use wood filler before sanding.
Step 4: Apply Primer
Primer helps the paint adhere better and provides a more even finish. Choose a high-quality stain-blocking primer, especially if your cabinets are dark or have visible stains. Apply a thin, even coat using a brush or roller and let it dry completely before lightly sanding with 220-grit sandpaper. Wipe away any dust before painting.
Step 5: Painting Your Cabinets
Choosing the Right Application Method:
- Brush & Roller: A brush helps with edges and corners, while a foam roller gives a smooth, streak-free finish.
- Paint Sprayer: Offers an ultra-smooth, professional-grade finish but requires proper masking and ventilation.
Apply the first coat of paint using long, even strokes. Let it dry completely before applying the second coat. Depending on the type of paint used, you may need a third coat for full coverage. Always follow the manufacturer’s recommended drying times.
Step 6: Sealing for Durability
To protect your freshly painted cabinets from daily wear and tear, apply a polyurethane sealer. Choose a water-based polyurethane for a clear finish that won’t yellow over time. Apply in thin layers and let each coat dry completely before reattaching hardware.
Step 7: Reassemble Your Cabinets
Once everything is completely dry, reinstall the cabinet doors and drawers, and attach the hardware. Take your time to ensure everything is properly aligned for a polished look.
Common Mistakes to Avoid
- Skipping sanding or priming: Leads to poor paint adhesion and chipping.
- Using the wrong type of paint: Not all paints are suitable for cabinets; opt for durable, cabinet-grade paint.
- Not allowing enough drying time: Rushing between coats can result in a tacky or uneven finish.
- Neglecting to clean cabinets properly: Residual grease can prevent paint from adhering correctly.
Final Thoughts
Painting kitchen cabinets is an excellent way to refresh your space without the hefty price tag of a full remodel. By following these steps, using high-quality materials, and exercising patience, you can achieve a professional-looking finish that will last for years. Whether you opt for classic white cabinets, trendy navy blue, or a bold pop of color, your newly painted cabinets will transform your kitchen into a stylish and inviting space.


