The Dock is one of the most essential parts of the macOS system. The Dock is the brains of your Mac or MacBook. It’s usually at the bottom of the screen. That’s where all of your most-used apps are kept, and being able to open a program by clicking on an icon is very handy. But how do I change the Dock so that the apps I love are shown?
It’s really easy to change the look of your macOS Dock, and we’ve put together this guide to show you how.
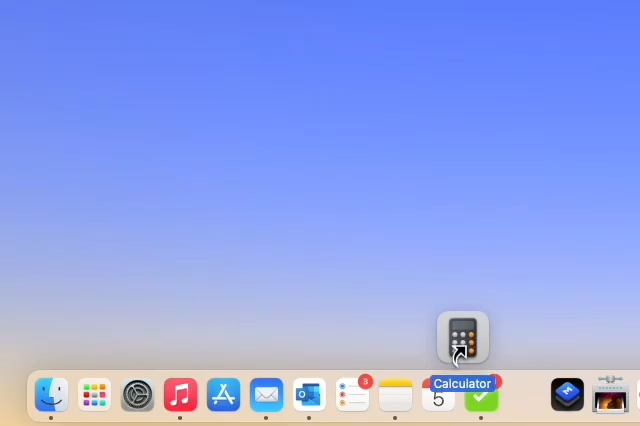
Drag to add apps to the Dock.
Dragging an app to the Dock is the fastest way to add it to a Mac. You can use the app’s icon on your desktop or in the Applications folder to do this.
Note: Here are the sections you need to know about if your Dock is vertical on the right or left side of your screen instead of horizontal.
Step 1: Pick out the app you want to add to the Dock.
Step 2: To reposition it, simply drag it to the Dock. If you’d rather not view recently used apps, move it to the left of the line that separates them (refer to the section below) or the files and folders section.
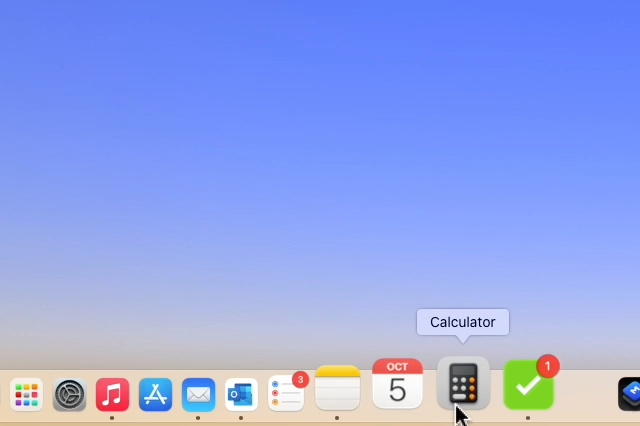
To make way for it, any apps that are in the way will be moved.
Step 3: Let go to drop the app in the Dock. This makes an alias of the program when you do it. In the Applications area, you can still get to the original app.
Utilize the Options to display and maintain the Dock’s recent app list.
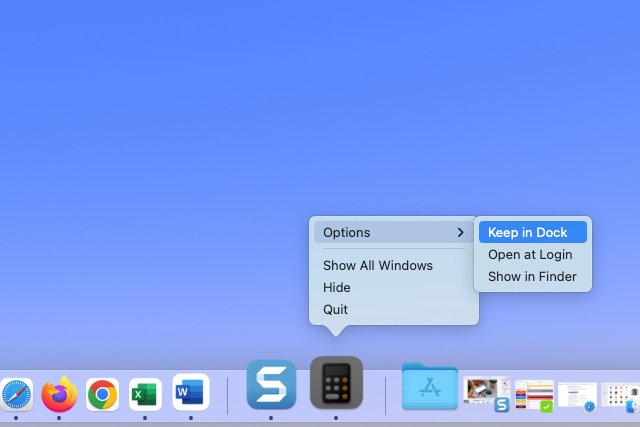
You can also use the Options button to add an app to your Dock. You can do this for an app that is currently being used or one that is in the last-used apps area of the Dock.
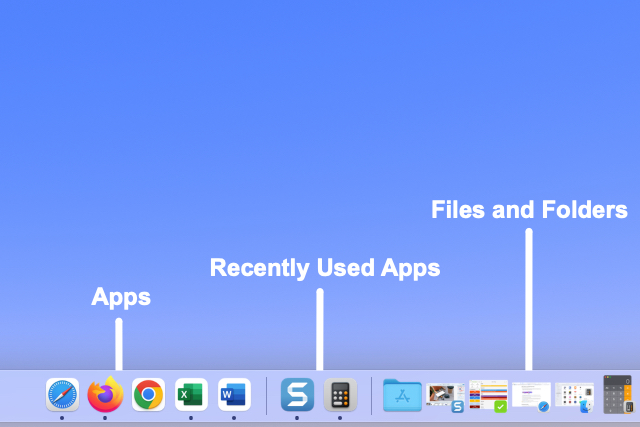
You can put recently used apps in their part in the Dock, which is what this section is for.
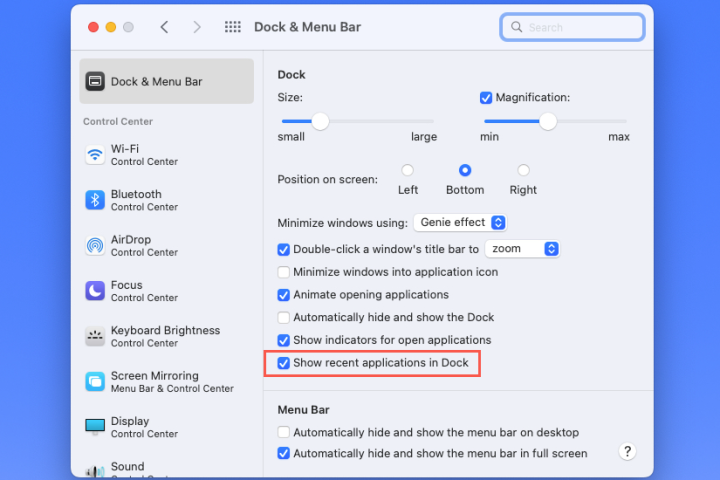
Step 1: Select the Apple menu item or Dock button to bring up System Preferences.
Step 2: Pick out the dock and menu bar.
Step 3: Make sure that the Dock & menu bar is chosen on the left, and then check the box next to Show Recent Apps in Dock on the right.
Later, if you change your mind about liking this part of the Dock, you can simply go back to this spot and uncheck the box.
Step 4: Next, you’ll see this part of the Dock. Your apps will be on the right, and your open files and folders will be on the left. If you use the vertical view, move it around in the Dock to fit.
Step 5: Right-click or hold down Control and choose one of these apps to keep in the Dock. After that, go to Options and select Keep in Dock.
The app then goes from the section for recently used apps to the section for apps on the left.
You can do the same thing with apps in your Dock that are already open. Pick Keep in Dock from the menu that comes up when you right-click.
Drag to remove apps from the Dock.
It’s as easy to take an app off the Dock as it is to add one.
Step 1: Pick out the app from the Dock that you want to get rid of.
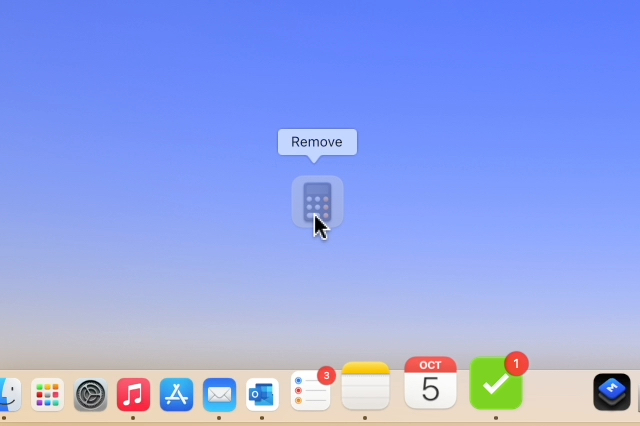
Step 2: Drag it off the Dock and onto a free space on your screen.
Step 3: Let go of the app when you see the word “Remove” appear above it.
This only gets rid of the app from your Dock. The app in your Dock is just an alias, so removing it here won’t get rid of it on your Mac.
Remove apps from the Dock using Options.
Using Options, you can remove an app from your Dock in the same way that you added a new one.
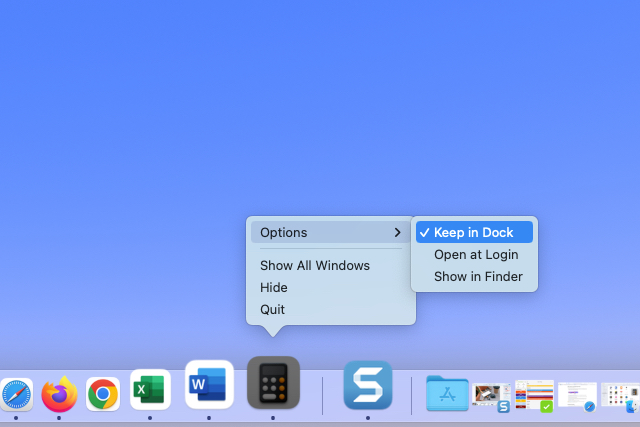
Step 1: Select the app in the Dock by right-clicking or holding down Control.
Step 2: Point your mouse to Options.
Step 3: Uncheck the box next to Keep in Dock.
It saves you time not to have to look for the apps you use every day in Finder or the Applications folder when they are in the Dock.
Check out how to use different desktops for more ways to get more done on your Mac.

