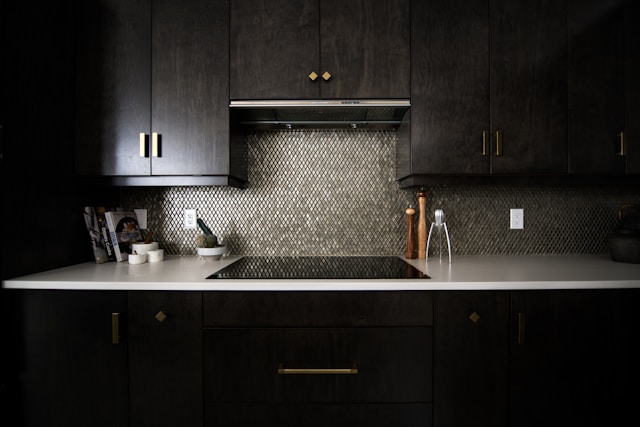
The kitchen is often considered the heart of the home, and one of the simplest ways to upgrade it is with a stylish backsplash. A well-designed kitchen backsplash not only protects your walls from splatters and stains but also adds character and visual appeal. The best part? You don’t need a professional contractor or a huge budget to get the look you want. With the right materials and a bit of creativity, you can easily tackle a DIY kitchen backsplash project that enhances your space and reflects your personal style.
In this guide, we’ll explore a range of easy backsplash projects, from quick peel-and-stick solutions to more advanced installations using tile and wood. Whether you’re a beginner or a seasoned DIYer, these ideas will inspire you to transform your kitchen into something fresh and functional.
Benefits of a DIY Kitchen Backsplash
Before diving into specific designs, it’s important to understand why a DIY backsplash is a great home improvement project.
1. Cost Savings:
Professional kitchen renovations can get expensive quickly. Installing a backsplash yourself dramatically reduces labor costs, allowing you to invest in better materials or pocket the savings.
2. Customization and Creativity:
DIY kitchen backsplash projects give you the freedom to express your unique taste. You can choose patterns, colors, and textures that align perfectly with your kitchen decor.
3. Quick and Impactful Updates:
Backsplashes cover a small area but make a big visual impact. Whether you want a modern touch or a rustic vibe, a new backsplash can completely transform your kitchen in a weekend.
Top DIY Kitchen Backsplash Ideas
1. Peel-and-Stick Tiles
Peel-and-stick backsplash tiles are perfect for beginners or renters who want an easy, mess-free solution. These tiles come in various styles, including faux subway tile, mosaic, marble, and even metallic finishes.
They’re lightweight, easy to cut with scissors or a utility knife, and require no special tools. Simply peel off the backing and press onto a clean surface.
Why it works:
-
Affordable and renter-friendly
-
No grout or adhesives needed
-
Removable without damaging walls
Pro tip: Clean the wall with rubbing alcohol before applying for better adhesion.
2. Subway Tile with Grout
A timeless choice, subway tile adds a clean, classic look to any kitchen. This backsplash style works well in both modern and traditional settings. You’ll need tile adhesive, grout, spacers, and a tile cutter for installation, making it slightly more advanced but totally doable for an enthusiastic DIYer.
Why it works:
-
Easy to clean
-
Available in various colors and finishes
-
Great resale value appeal
Pro tip: Use a contrasting grout color to make the tile pattern pop.
3. Beadboard Panels
Beadboard is a charming and inexpensive option, especially for farmhouse or cottage-style kitchens. It comes in large panels that can be cut to size and glued or nailed directly to the wall. Paint it any color to match your theme.
Why it works:
-
Simple installation
-
Customizable with paint
-
Adds vertical visual interest
Pro tip: Apply a clear waterproof sealant to protect it from moisture near the sink or stove.
4. Painted Glass or Acrylic Sheets
For a modern, seamless look, consider using clear or colored glass or acrylic panels as your backsplash. These materials create a sleek, glossy finish and can be painted on the back to match your decor. Installation involves cutting the panels to size and securing them with adhesive or mounting clips.
Why it works:
-
Ultra-modern and minimalistic
-
Easy to clean and maintain
-
Reflective surface adds brightness
Pro tip: Use tempered glass for durability and heat resistance.
5. Reclaimed Wood or Shiplap
If you love rustic charm or farmhouse kitchens, reclaimed wood or shiplap boards make a beautiful and textured backsplash. Just be sure to seal the wood properly to protect against moisture and grease. This option works best in low-splash areas unless fully sealed.
Why it works:
-
Eco-friendly and full of character
-
Unique texture and warmth
-
Great for open shelving backdrops
Pro tip: Apply a food-safe polyurethane to help preserve the wood and make it easier to clean.
6. Stenciled Backsplash
Painting a faux tile pattern using stencils is one of the most budget-friendly backsplash ideas. All you need is a stencil, some painter’s tape, and high-quality paint. It’s a great way to get a patterned look without installing actual tile.
Why it works:
-
Extremely low cost
-
Customizable patterns and colors
-
Great for creative DIYers
Pro tip: Use a level to keep your pattern straight and even across the wall.
7. Metal or Tin Tile Panels
For an industrial or vintage feel, metal backsplash panels such as aluminum or embossed tin tiles are a great choice. These panels are easy to install and bring instant texture and shine to your kitchen.
Why it works:
-
Fire and water-resistant
-
Adds character and reflects light
-
Great for accent walls behind the stove
Pro tip: Pair metal backsplashes with neutral cabinets to create contrast and balance.
Design Tips for Choosing the Right Backsplash
Choosing the perfect kitchen backsplash goes beyond materials. Here are a few tips to make sure your backsplash complements your space:
-
Coordinate with cabinets and countertops: Look for colors and textures that enhance rather than clash with existing kitchen elements.
-
Balance texture and pattern: If your countertop is busy, go for a simpler backsplash, and vice versa.
-
Measure twice, cut once: Accurate measurements prevent waste and ensure cleaner installation.
-
Think about cleaning: Glossy or non-porous surfaces are easier to wipe down than rough or porous ones.
Installation Tips and Tools You’ll Need
Depending on the material you choose, your DIY kitchen backsplash project may require different tools. Here are some essentials:
Common Tools:
-
Tape measure
-
Level
-
Utility knife
-
Tile cutter or saw (for ceramic tiles)
-
Trowel and grout float (for tiling)
-
Caulk and sealant
Safety Tips:
-
Wear gloves and eye protection when cutting materials
-
Turn off power when working near outlets
-
Always follow manufacturer instructions
Avoid These Common Mistakes:
-
Not prepping the wall properly
-
Skipping the level check
-
Using too much or too little adhesive
-
Not sealing the backsplash when needed
Conclusion
A DIY kitchen backsplash is a rewarding project that can drastically transform your space without a hefty price tag. Whether you’re drawn to the simplicity of peel-and-stick tiles, the timeless look of subway tile, or the creative freedom of stencils and wood, there’s an option for every skill level and design style.


