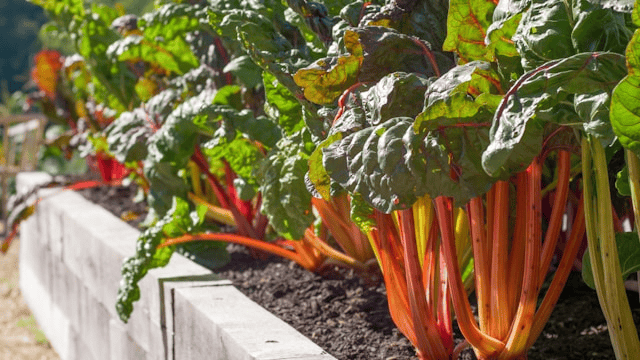
Raised garden beds are one of the most effective and rewarding ways to grow your own vegetables, herbs, and flowers at home. Whether you’re an experienced gardener or just starting out, learning how to build a raised garden bed can transform your backyard into a productive and beautiful space. With better drainage, improved soil control, and easier access for planting and maintenance, raised beds are a top choice for backyard gardening enthusiasts.
In this comprehensive guide, we’ll walk you through the entire process of building your own raised garden bed from planning and material selection to construction and planting. Let’s dig in!
Why Choose a Raised Garden Bed?
Before we dive into the how-to, it’s important to understand the benefits of raised beds. Here’s why so many people are turning to raised bed garden plans:
-
Improved Soil Quality: You control what goes in, which means you can create the best soil for raised garden beds tailored to your plants.
-
Better Drainage: Elevated beds reduce waterlogging and promote healthy root systems.
-
Ease of Access: Less bending and kneeling make gardening easier on your back and knees.
-
Fewer Weeds and Pests: Barriers and strategic placement reduce common garden nuisances.
-
Extended Growing Season: Soil in raised beds warms up faster in spring, allowing for earlier planting.
Planning Your Raised Garden Bed
Before you start building, spend some time planning your raised garden bed for backyard use. Thoughtful preparation leads to better results.
Choose the Right Location
Select a site that receives at least 6–8 hours of sunlight daily, as most vegetables need full sun. Make sure the location is accessible for watering and close to your home if convenience is a priority.
Decide on Size and Layout
A standard size is 4 feet wide by 8 feet long and 12–18 inches high. This width allows you to reach the center from either side without stepping on the soil. The length can vary depending on available space.
You can also design multiple beds in a grid layout for a more organized backyard garden.
Gather Tools and Materials
You’ll need the following tools and supplies:
-
Tape measure
-
Saw (for cutting wood)
-
Drill or screwdriver
-
Screws or nails (galvanized to resist rust)
-
Level
-
Shovel or hoe
-
Wood or other material (see below)
-
Soil and compost
Choosing the Right Materials
When building a DIY raised garden bed, selecting the right materials is crucial for durability, safety, and budget.
Wood Options
Wood is the most popular material due to its natural look and ease of use. Consider these types:
-
Cedar: Naturally rot-resistant and chemical-free, but more expensive.
-
Pine: Budget-friendly but less durable; may need replacing every few years.
-
Redwood: Another rot-resistant option, often used in premium raised bed designs.
Avoid treated lumber, which may contain chemicals that could leach into the soil unless it’s certified safe for garden use.
Alternatives to Wood
If you prefer something longer-lasting or more modern-looking, consider:
-
Metal: Galvanized steel beds are sleek, durable, and resistant to pests.
-
Composite: Made from recycled wood and plastic, these are eco-friendly and weather-resistant.
-
Stone or Brick: Permanent and decorative but require more labor to install.
How to Build a Raised Garden Bed
1. Prepare the Site
Clear the area of grass, rocks, and weeds. Level the ground as best as possible. You can lay down a weed barrier (like landscape fabric or cardboard) to reduce future maintenance.
2. Build the Frame
Measure and cut your materials to size. A common layout uses four boards: two 8-feet long and two 4-feet long for a rectangular frame.
-
Screw the boards together at the corners using galvanized screws.
-
Use a square or level to ensure the corners are straight.
-
For taller beds (over 18 inches), add internal support stakes to prevent bowing.
3. Place and Secure the Bed
Position the frame in your chosen spot. Check again for levelness this helps with even water distribution.
Optional: Use ground stakes or anchors to secure the bed if your location is windy or sloped.
4. Fill the Bed with Soil
The best soil for raised garden beds includes:
-
60% topsoil
-
30% compost
-
10% soilless mix (peat moss, coconut coir, or vermiculite)
Mix thoroughly before filling the bed. This blend ensures nutrients, good drainage, and soil structure.
Planting and Maintaining Your Raised Garden Bed
What to Plant
Choose plants based on your climate and season. Raised beds warm faster in spring, giving you a head start.
Cool-season crops: Lettuce, spinach, peas, radishes
Warm-season crops: Tomatoes, peppers, cucumbers, beans
Herbs: Basil, thyme, parsley, chives
Use companion planting strategies to maximize space and reduce pests.
Watering and Fertilizing
Raised beds dry out faster than in-ground beds, so consistent watering is key especially in hot weather. Drip irrigation or soaker hoses are ideal.
Apply organic fertilizers or compost every few weeks to replenish nutrients.
Mulching and Pest Control
Add a layer of mulch (straw, leaves, or bark) to retain moisture and suppress weeds.
To keep pests at bay:
-
Use row covers or netting
-
Introduce beneficial insects (like ladybugs)
-
Rotate crops annually
Conclusion
Now that you know how to build a raised garden bed for your backyard, it’s time to start digging and planting. Whether you want to grow fresh vegetables, herbs, or flowers, a raised bed gives you the perfect foundation for a thriving garden. With the right planning, materials, and maintenance, you can enjoy the benefits of DIY raised garden beds for years to come.


