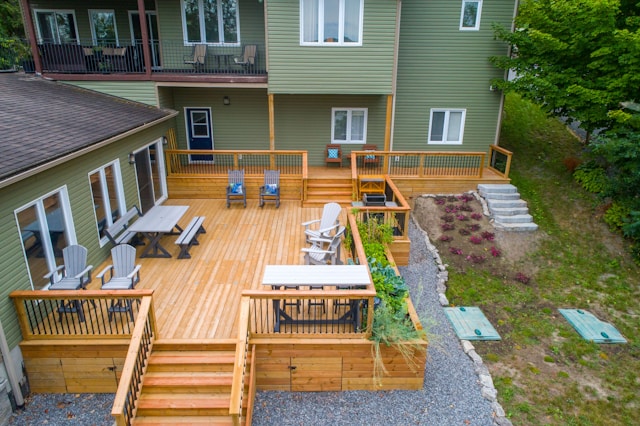
A weathered, faded deck can make your outdoor space feel neglected and uninviting. Over time, sun exposure, moisture, foot traffic, and general wear and tear can take a toll on your deck’s appearance and safety. The good news? You don’t have to replace the whole thing. With a bit of effort and the right tools, DIY deck restoration can transform your deck from dull and damaged to vibrant and functional without hiring a professional.
This comprehensive guide walks you through how to restore a wooden deck, from inspection and repairs to cleaning, sanding, and sealing. Whether your goal is a simple refresh or a full-on makeover, these steps will help bring your deck back to life.
Assessing the Damage
Before diving into deck repair and refinishing, start with a thorough inspection. Look for warped or cracked boards, loose nails or screws, mildew buildup, and signs of rot especially around the base and under the stairs. Tap boards with a screwdriver to test for soft spots, which could indicate deeper rot.
Check railings and support posts for wobbling or movement, and make sure the overall structure is sound. If the foundation is compromised or there’s widespread decay, a full rebuild may be necessary. Otherwise, most surface-level issues can be fixed through DIY deck restoration.
Cleaning the Deck
Cleaning is a crucial first step in restoring a wooden deck. Begin by sweeping away debris like leaves and dirt. Then, apply a deck cleaner or a homemade solution (like vinegar and water) to kill mildew and remove stains. For stubborn grime or algae, use a stiff brush or deck scrubber.
Power washing is highly effective for deep cleaning, but it must be done carefully. Use a fan tip and hold the wand at a slight angle to avoid gouging the wood. Always follow the manufacturer’s guidelines and allow the deck to dry for at least 48 hours before moving on to repairs or staining.
Repairing Structural and Surface Issues
Once your deck is clean and dry, you can tackle visible damage. Replace splintered or rotten boards, and use galvanized screws to secure any loose planks or railing sections. Avoid nails, which can work loose over time and create tripping hazards.
If you’re dealing with surface cracks or gaps, consider using a deck filler or wood putty. These products can smooth out imperfections before deck refinishing and create a more uniform surface. Be sure to match the color of your filler with your deck stain or paint.
Sanding the Surface
Sanding is a critical but often overlooked step in DIY deck restoration. It removes residual finishes, smooths rough patches, and prepares the wood to absorb new stain or paint evenly. Use a belt or orbital sander for large surfaces and sanding sponges for edges or tight spots.
For the best results, use 60- to 80-grit sandpaper to start, followed by a finer 100- to 120-grit for a smoother finish. Always sand in the direction of the wood grain to avoid scratches. Once finished, sweep or vacuum the dust thoroughly before applying any finishes.
Staining or Painting
This is where your deck truly comes back to life. Choose a stain or paint designed for exterior wood. Stains are great for showcasing natural grain and offer varying levels of opacity (transparent, semi-transparent, or solid). Paint, on the other hand, provides a more vibrant color and added protection but hides the wood grain.
When choosing between oil-based and water-based products, consider durability and ease of cleanup. Oil-based stains penetrate deeply and last longer, while water-based options are eco-friendlier and dry faster.
Apply the product using a brush, roller, or sprayer, and always follow the wood grain. Apply at least two thin coats, allowing each coat to dry thoroughly. This is the key to a smooth and long-lasting deck repair and refinishing job.
Sealing and Protecting the Deck
Once the stain or paint has fully dried, consider applying a clear sealant to enhance durability and weather resistance. Some stains already contain sealant, but if yours doesn’t, adding a dedicated sealant will provide extra protection against UV rays, moisture, and mildew.
A good sealant extends the lifespan of your finish and makes ongoing maintenance much easier. Reapply every 1–2 years depending on your climate and how often your deck is used.
Regular Maintenance Tips
After your budget-friendly deck makeover, regular upkeep will help you avoid major repairs in the future. Here are a few tips to keep your deck in top shape:
-
Sweep regularly to remove dirt and leaves
-
Clean spills immediately to prevent staining
-
Inspect annually for signs of damage or loose hardware
-
Reapply stain or sealant every couple of years
-
Keep plants and furniture from trapping moisture against the wood
Conclusion
Restoring your deck doesn’t have to be expensive or overwhelming. With a little time, elbow grease, and the right materials, DIY deck restoration allows you to reclaim your outdoor space and enjoy it for years to come. By following these steps from cleaning and repairs to sanding, staining, and sealing you’ll not only improve the look of your deck but also protect it from future wear and weather.


