
Finding extra space in your home can be a challenge, especially if you’re working with limited square footage. Fortunately, a few clever DIY shelving ideas can help you unlock hidden potential in any room. Whether you’re organizing clutter, displaying décor, or just looking for a smart way to enhance your storage, building your own shelves is a fun and rewarding project.
Not only are home storage solutions practical, but DIY shelves also allow you to customize your space while saving money. From floating shelves to industrial pipe designs, there’s a shelving style for every taste and budget. Let’s explore some creative, space-saving shelves you can build yourself and transform your living area.
Why Choose DIY Shelving?
DIY shelving projects offer several advantages over pre-made options. First, they’re often more affordable, especially if you already own some basic tools. Second, they allow for full customization in terms of size, materials, and style. Whether you want something sleek and modern or rustic and cozy, easy shelving ideas can be adapted to suit your exact preferences.
Beyond aesthetics, DIY shelves make the most of otherwise unused areas like corners, nooks, or wall space above doors. With the right design, you can store more while making your home look cleaner and more organized.
Creative DIY Shelving Ideas
Here are some of the most popular and functional DIY shelving styles you can try at home:
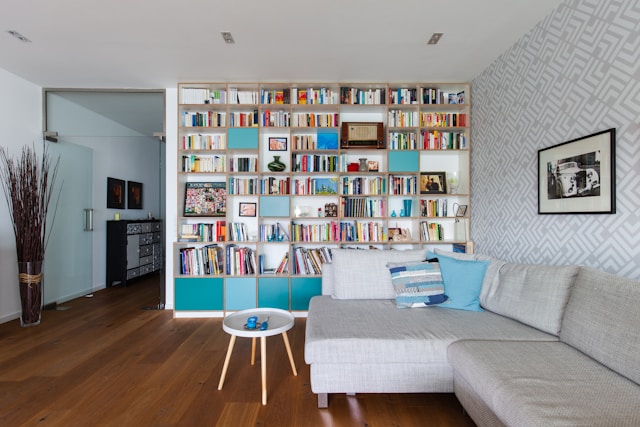
1. Floating Shelves
Floating shelves are sleek, minimal, and incredibly versatile. These wall-mounted shelves are ideal for small rooms where you want to avoid bulky furniture. They’re great for displaying books, plants, or kitchen items without the visual weight of brackets.
To build DIY floating shelves, all you need is a wooden board, wall anchors, and a hidden mounting bracket. Paint or stain the wood to match your room’s color scheme for a polished finish.
2. Corner Shelves
Make the most of awkward corners with L-shaped or triangular corner shelves. These are perfect for adding storage without sacrificing floor space. Use reclaimed wood for a rustic vibe or choose a clean, white finish for a modern touch.
Corner shelves work especially well in bathrooms, kitchens, or bedrooms where extra storage is often needed but space is limited.
3. Ladder Shelves
Ladder shelves lean against the wall and provide tiered storage in a stylish, open format. They’re ideal for displaying decorative items, towels, or toiletries. You can build one using wooden planks and dowels, and the best part is—they’re easy to move around.
This DIY shelving idea is both functional and aesthetic, making it a popular option for modern interiors.
4. Crate Shelves
Wooden crates can be repurposed into stackable, modular shelves. Simply sand and stain old fruit crates, then mount them on the wall or stack them vertically for a rustic storage system.
Crate shelves are a great project for beginners and make excellent home storage solutions for entryways, kids’ rooms, or pantries.
5. Pipe and Wood Shelves
For an industrial look, combine metal piping with stained wood boards. This durable shelving option is ideal for heavier items like kitchenware, books, or tools. Metal pipes are available at most hardware stores and are easy to assemble with a few basic tools.
This style of DIY floating shelves adds character and strength to your storage system, perfect for lofts or modern urban interiors.
6. Over-Door or Under-Stair Shelves
Make use of overlooked spaces by installing shelves above doorways or beneath staircases. These areas are often wasted but can provide valuable storage for books, baskets, or seasonal items.
With a little creativity, these space-saving shelves can transform dead zones into practical and stylish solutions.
Tools and Materials You’ll Need
Before you get started, make sure you have the following tools and supplies:
-
Measuring tape and level
-
Drill and screwdriver
-
Saw (circular, jigsaw, or hand saw)
-
Wood boards (cut to desired length)
-
Screws, wall anchors, and brackets (if needed)
-
Sandpaper or electric sander
-
Paint, stain, or wood sealer
Always measure twice and cut once to ensure accuracy. Safety goggles and gloves are also recommended for protection.
Step-by-Step Building Tips
-
Plan Your Design: Sketch your idea and decide on measurements. Consider the weight your shelves will hold and select materials accordingly.
-
Cut and Prepare Materials: Cut wood to size and sand all edges for a smooth finish.
-
Assemble and Mount: Use brackets or hidden mounts to secure your shelf. Always check for wall studs when mounting heavier shelves.
-
Add Finishing Touches: Paint or stain the wood to match your home’s interior. Allow time to dry before placing items on the shelves.
Styling Your DIY Shelves
Once your shelves are installed, think about how you want to style them. Combine decorative and practical items to create balance. Use baskets, boxes, or jars to organize smaller items. Incorporate plants, books, and artwork for a personal touch.
Your home storage solutions don’t have to be purely functional they can also enhance the overall design of your space.
Maintenance and Safety Tips
-
Periodically check screws and mounts to ensure stability.
-
Avoid overloading shelves, especially those mounted without visible brackets.
-
Clean wooden surfaces with a damp cloth and avoid harsh chemicals.
Conclusion
Building your own shelves is a rewarding way to boost your home’s organization without breaking the bank. These DIY shelving ideas are suitable for every room and skill level, offering endless customization options. With a bit of effort, you can create space-saving shelves that are both beautiful and practical.


